


Watch video tutorial click HERE and to Download video version click HERE
In practice this time, we will make the reels on a photo. To be more realistic results you should be able to imagine the shape of the first roll of photos
 |
| ©andiartdesign.blogspot.com |
To make it, please follow the steps below:
- The first step is open the image with a select menu File> Open, then select the picture
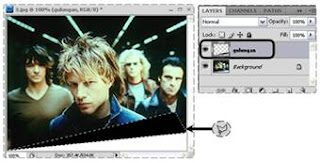
- Then Make a triangle with the Polygon Lasso Selection Tool like the example below, then press Delete, so that selected parts become white
- Press Ctrl + D to eliminate selection.

©andiartdesign.blogspot.com - Create a new layer, do I press Shift + Ctrl + N, Name the layer "roll"..
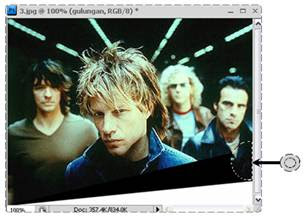
- Make a selection triangle next to the white triangle using the Polygon Lasso Tool like the example below, then press Alt + Delete so selected to be part black.
- Press Ctrl + D to eliminate Selection.
©andiartdesign.blogspot.com - Still on the layer rolls, make the selection using the Eliptical Marquee Tool circle on the black triangle, and press Delete.
- Remove the selection by pressing Ctrl + D.
©andiartdesign.blogspot.com - So that the roll was evident, select Layer> Layer Style> Drop Shadow, and set the parameters such as the example below:
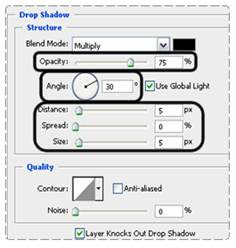
©andiartdesign.blogspot.com


10. Then Select Menu Layer> Layer Style> Gradient Overlay, and set the parameters such as the example below:
 |
| ©andiartdesign.blogspot.com |
"Good Luck"